

2 MUST-KNOW Tips for Rendering your Artworks!
One of the most important steps in a drawing process that most miss is the rendering step.
This is when you go over everything (generally with a new layer) and tweak details, add lighting and more colors, and add more realistic shading, but a lot of people aren’t sure how to do this.
So today we’re going to cover my top three tips for making your rendering effective.
The Right Way
First off, there is no one right way to render, no specific rules that you have to follow. The rendering step is more about letting your inner artist shine and adding whatever your specific artwork or style needs. It’s one of the most chaotic steps in the drawing process for this reason.
So while you could potentially add something that only took away from the appeal of your drawing, there is no specific order of steps. I’m just going to show you how to make sure you’re making the best decisions for your artwork!
Tip #1: Pick a color scheme to add throughout your artwork
A good rule of thumb for your color scheme is two colors that you can use throughout the art that will look cohesive together.
For example, the two colors I chose for rendering this artwork are red and blue, to match the two balloons. This instantly adds cohesion to your works when you put the color throughout other parts of the subject.
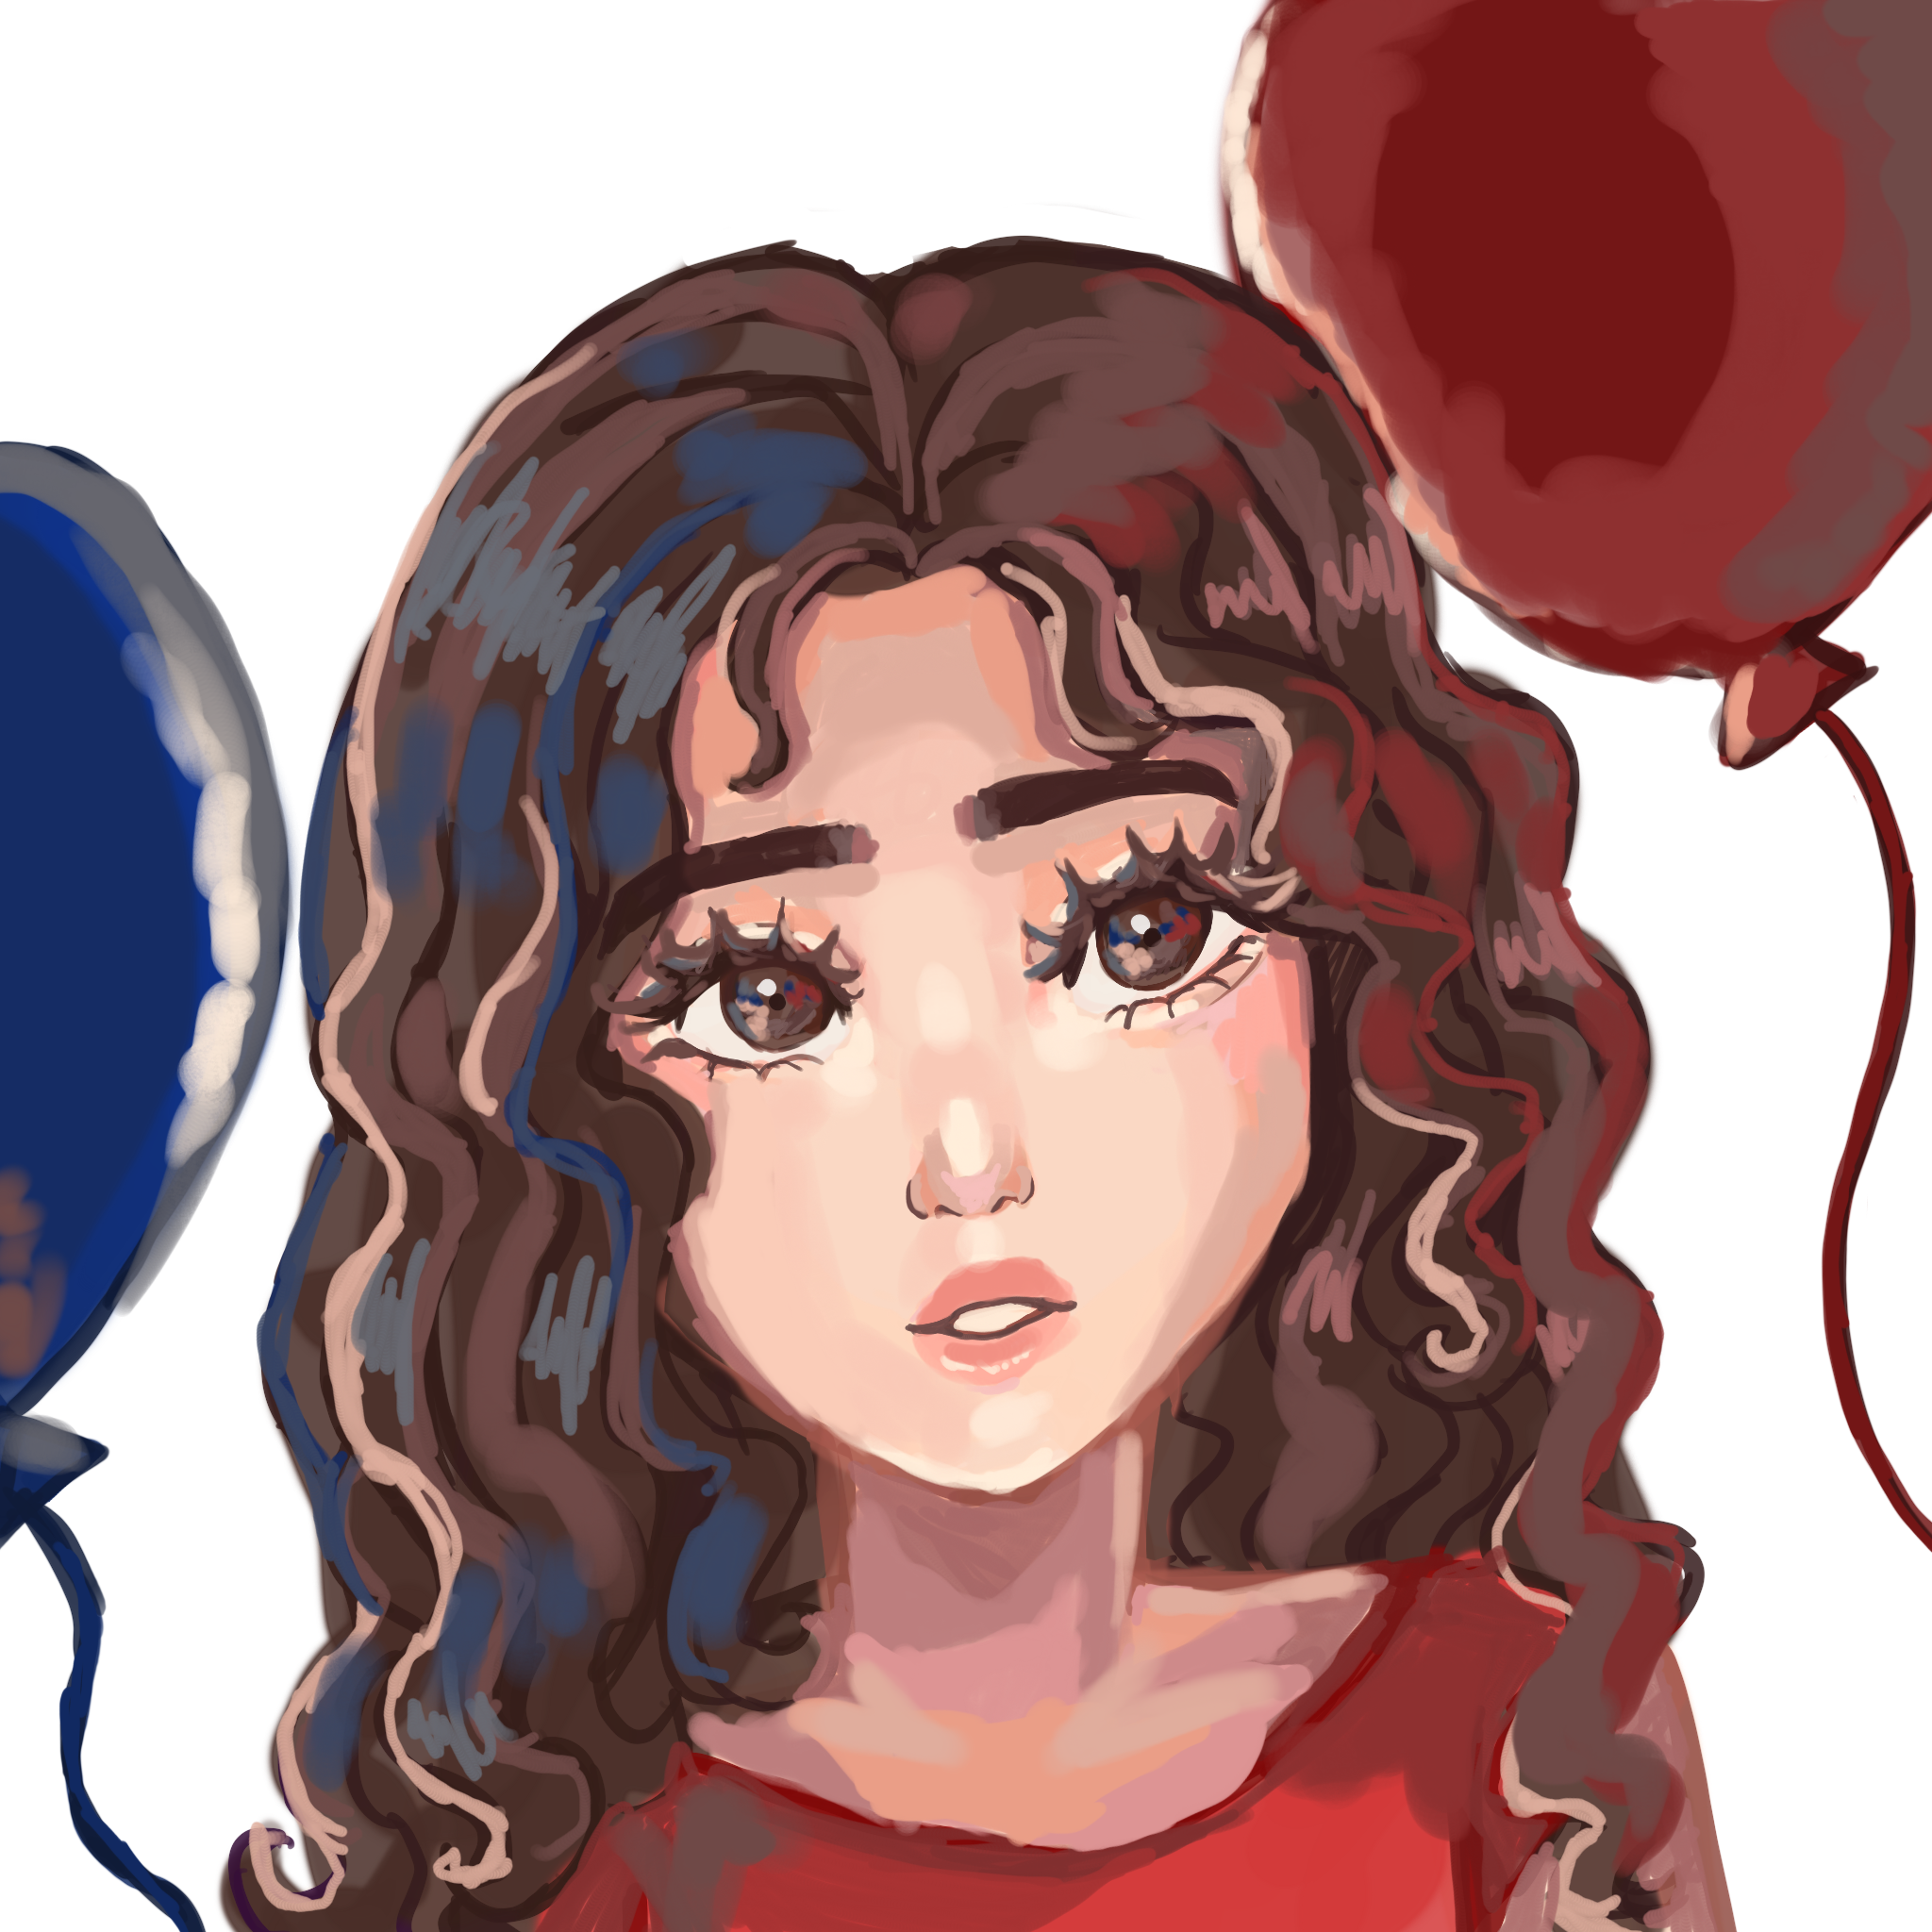
Add the colors in the hair, the eyes, subtly in the clothes, and everything will look so much more pleasing to the eye.
You can also do this in reverse by adding the colors of the hair or skin to other parts, too. For example, I added those colors to the balloons in the example artwork.
Tip #2: Use many different hues when shading
Things in real life do not have only one hue spectrum, there are many hues and saturation levels in real life. If you make the mistake of using only darker or lighter versions of what you’re shading, your artwork becomes one-dimensional.
Instead, make sure to pick some colors that are less saturated and lighter, more saturated and darker, and so on.
For example, the skin has many different colors, including pinks, oranges, and grey-browns. Now look at the before and after of the skin—doesn’t it look so much more two-dimensional?
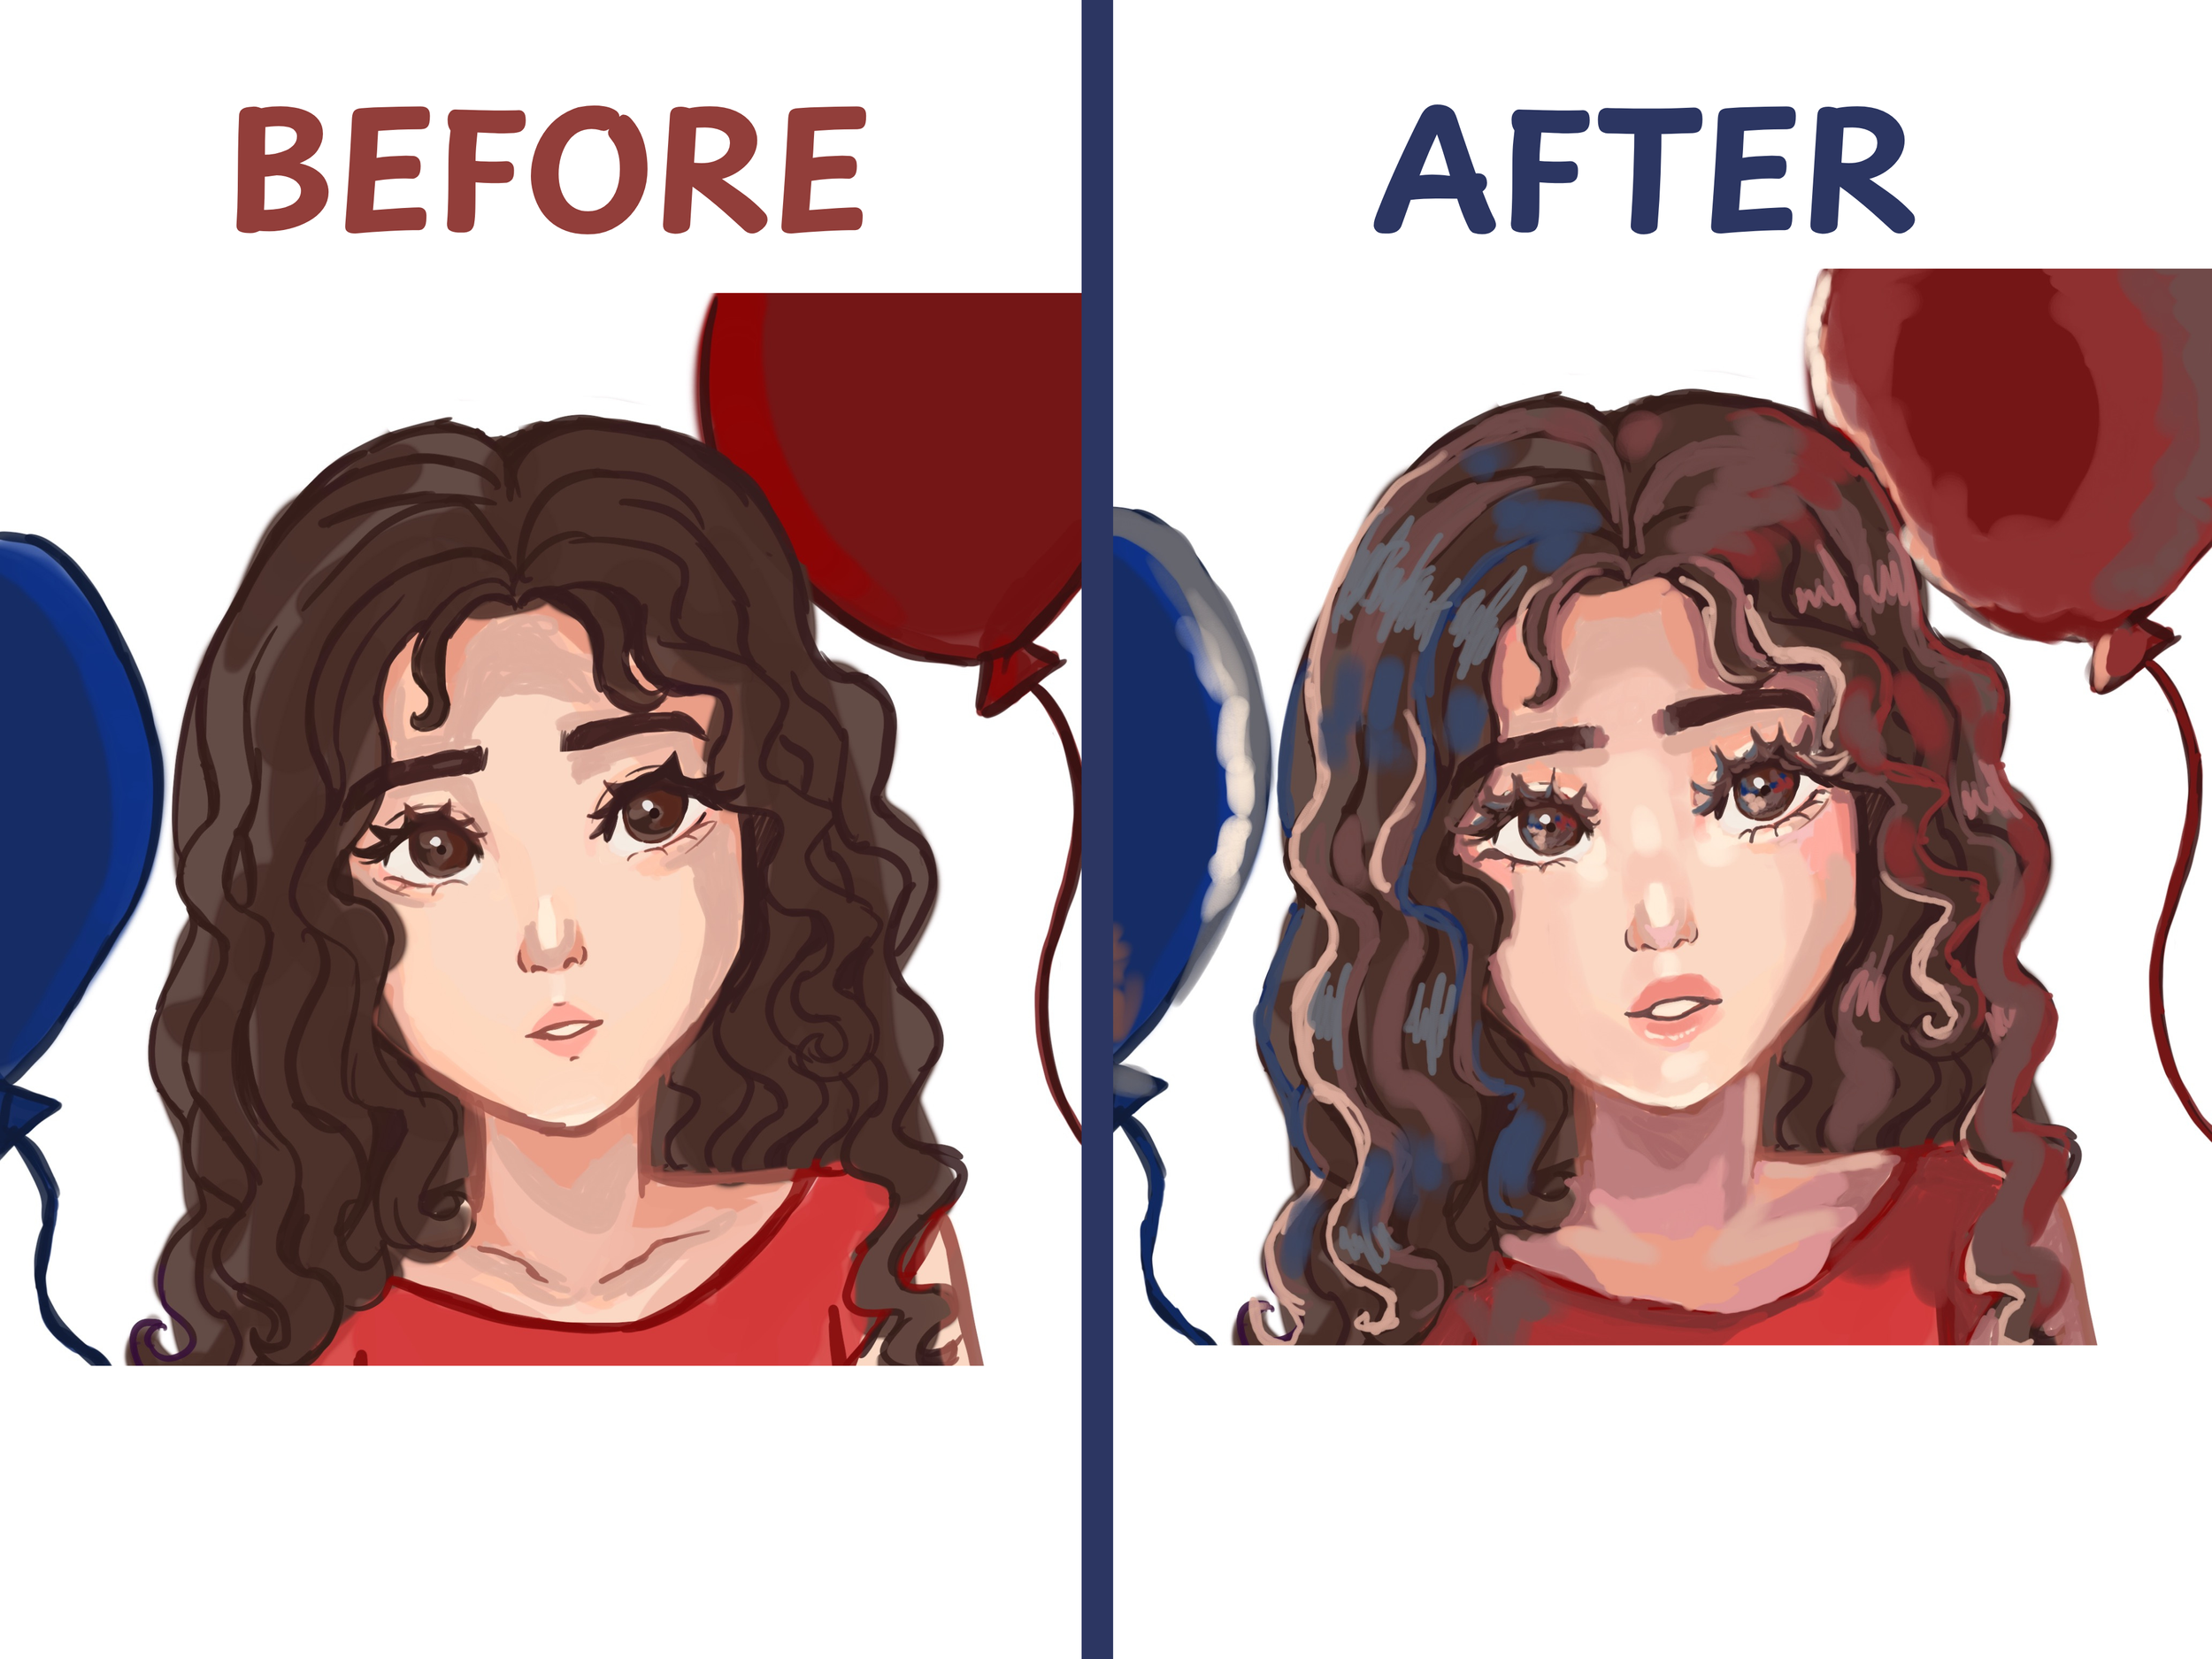
In the first version, there was an extremely limited color variation I was working from—maybe three colors at most.
But, unlike tip 1 for the main color scheme, the colors you use for shading should have a large amount of colors. The colors I used for the skin in the second version range from purple to yellow, with all different levels of saturation and brightness.